


how to keep your clothes from wrinkling
Here are some tips on how to keep your clothes from wrinkling:
Fold or hang clothes immediately after drying to prevent wrinkles from setting in.
Use high-quality hangers to maintain the shape of your clothing, especially for delicate items.
Avoid overloading your closet or dresser to allow clothes to breathe and prevent crushing.
Choose fabrics that are less prone to wrinkling, like wrinkle-resistant blends or synthetic materials.
Use garment bags for storing and traveling to protect clothes from wrinkles and damage.
Pack your suitcase strategically, rolling clothes or using packing cubes to minimize wrinkles.
Toss wrinkled clothes in dryer.
Steam or iron your clothes as needed to remove wrinkles before wearing them.
Invest in a portable clothing steamer for quick touch-ups on the go.
Hang your clothes in the bathroom while taking a hot shower to help release wrinkles.
Be mindful of how you sit or move in your clothes to prevent excessive creasing.
Following these tips can help keep your clothes looking fresh and wrinkle-free.

general steps for removing stains from dry clean only clothing
Here are some general steps for removing stains from dry clean only clothing:
Act quickly
The sooner you address a stain, the better chance you have of removing it.
Blot, don’t rub
Use a clean cloth or paper towel to blot the stain gently. Rubbing can spread the stain and damage the fabric.
Test a hidden area
Before attempting any stain removal method, test it on an inconspicuous part of the garment to ensure it won’t harm the fabric.
Identify the stain
Determine the type of stain you’re dealing with, as different stains may require different treatment.
Use a mild detergent
Mix a small amount of mild detergent with water and apply it to the stain. Gently blot and rinse with cold water.
Stain-specific treatments
Depending on the stain, you can use specific treatments like vinegar for wine stains, lemon juice for fruit stains, or a commercial stain remover.
Dry clean only products
There are stain removal products designed for dry clean only clothing. Follow the instructions on the product carefully.
Avoid water-based treatments
Limit the use of water-based stain removal methods, as they can cause water spots on delicate fabrics.
Consult a professional
If you’re unsure or the stain is stubborn, it’s best to take the garment to a professional dry cleaner.
Explain the stain
When taking the garment to the dry cleaner, be sure to inform them of the type of stain and what you’ve already done to treat it.
Remember that it’s always best to follow the care label instructions on your dry clean only clothing and, if in doubt, seek professional help from a dry cleaner.

how to wash tennis shoes
Here’s a list of steps on how to wash tennis shoes:
Remove the laces
Take out the shoelaces from your tennis shoes to make it easier to clean both the shoes and the laces separately.
Brush off loose dirt
Use a soft brush or cloth to remove any loose dirt, mud, or debris from the shoes’ exterior.
Pre-treat stains
If your tennis shoes have stubborn stains, apply a small amount of mild detergent or stain remover to the affected areas and let it sit for a few minutes.
Hand wash or machine wash
You can choose to hand wash or machine wash your tennis shoes. If using a machine, place the shoes in a pillowcase or laundry bag to protect both the shoes and the washing machine.
Select a gentle cycle
If using a washing machine, select a gentle or delicate cycle with cold water to avoid damaging the shoes.
Use mild detergent
Add a small amount of mild detergent to the washing machine or use a gentle hand wash detergent if washing by hand.
Avoid bleach
Do not use bleach or strong chemicals, as they can damage the shoe’s material.
Wash laces separately
If you’re cleaning the laces, place them in a mesh bag or pillowcase and wash them along with the shoes or separately.
Dry the shoes
After washing, remove the shoes from the machine or finish hand washing. Stuff the shoes with paper towels or newspaper to help them retain their shape and absorb excess moisture.
Air dry
Place the shoes in a well-ventilated area to air dry. Avoid direct sunlight and sources of heat, as they can cause the shoes to lose their shape or fade.
Re-lace & wear
Once the shoes are completely dry, re-lace them and you’re ready to wear your freshly cleaned tennis shoes.
Remember that the specific care instructions may vary depending on the material of your tennis shoes, so always check the manufacturer’s recommendations if available.

list of general care instructions for blankets
Here’s a list of general care instructions for blankets:
Read the Care Label
Always start by checking the care label on your blanket for specific manufacturer instructions.
Washing
Most blankets can be machine washed, but use a gentle cycle with cold water to prevent damage or shrinking. Follow the care label’s recommendations.
Detergent
Use a mild, color-safe detergent to protect the fabric’s color and texture.
Avoid Overloading
Don’t overcrowd the washing machine to allow the blanket to move freely and be cleaned thoroughly.
Avoid Bleach
Avoid using bleach or harsh chemicals, as they can damage the fibers and colors.
Dry Cleaning
Some blankets, such as wool or delicate materials, may require dry cleaning. Check the care label for guidance.
Drying
Air-dry whenever possible to prevent shrinking or damaging the fibers. If machine drying is necessary, use a low heat setting.
Pilling
To remove pilling (small fabric balls), use a fabric shaver or a lint remover.
Storage
Store your blankets in a cool, dry place away from direct sunlight to prevent fading and moisture damage.
Folding
When not in use, fold your blankets neatly to avoid wrinkles and creases.
Protect from Pets
Keep blankets away from pets to prevent damage from claws and fur.
Spot Cleaning
Quickly treat any stains or spills to prevent them from setting in the fabric. Blot, don’t rub, to avoid spreading the stain.
Rotation
Periodically rotate and flip your blankets to ensure even wear and tear.
Use a Cover
Consider using a blanket cover or duvet cover to protect your blanket from dirt and spills.
Repair
If your blanket gets damaged, consider patching or repairing it rather than discarding it.
Remember that specific care instructions may vary depending on the material and type of blanket, so always consult the care label or manufacturer’s recommendations for the best care practices.

how to use mothballs and other alternatives
Here’s a list of how to use mothballs and some alternatives to help protect your clothing and other items from moths:
How to Use Mothballs
Clothing Storage
Place mothballs in an airtight container or a plastic bag with your clothing to repel moths. Make sure the clothing is clean and dry before storing it.
Closet Placement
Hang mothballs in a fabric pouch or simply place them on shelves in your closet. Ensure they are out of direct contact with your clothes.
Drawer Use
Put mothballs in a small container or sachet and place it in drawers where you store clothing.
Shoe Storage
Put mothballs in your shoeboxes or use a breathable pouch to prevent moths from nesting in your footwear.
Under Furniture
Place mothballs under furniture like beds and dressers, as moths tend to hide in dark, undisturbed areas.
Alternatives to Mothballs
Cedar Blocks or Chips
Cedar naturally repels moths. Use cedar blocks, cedar chips, or cedar-lined storage containers in your closet.
Lavender Sachets
Lavender is a natural moth repellent. Create sachets with dried lavender flowers and place them in your drawers or closets.
Herbs & Spices
Cloves, rosemary, thyme, and bay leaves can help deter moths. Place them in small cloth bags or sachets and put them in your clothing storage areas.
Essential Oils
Soak a cotton ball in essential oils like lavender, cedarwood, or eucalyptus and place it in your closet. Refresh the cotton ball when the scent fades.
Vacuum & Clean
Regularly vacuum and clean your closet, as moths are attracted to food and sweat residues on clothing.
Store in Airtight Containers
Keep your clothing in airtight containers or vacuum-sealed bags to prevent moths from accessing them.
Freezing
Freeze clothing items for a few days to kill moth larvae. This is especially useful for delicate or non-washable items.
Regular Use
Rotate your clothing regularly so that moths don’t have a chance to settle and lay eggs in seldom-used items.
Remember that mothballs contain toxic chemicals and can be harmful if ingested or inhaled, so it’s essential to use them with caution and according to the manufacturer’s instructions. The alternatives listed above provide safer and more natural ways to protect your items from moths.

strategies for cleaning your house effectively
Here’s a list of strategies for cleaning your house effectively:
Create a Cleaning Schedule
Plan regular cleaning sessions to maintain a tidy home.
Declutter First
Before cleaning, remove clutter from surfaces and rooms.
Gather Supplies
Collect cleaning supplies like sprays, wipes, brushes, and a vacuum.
Start Top to Bottom
Dust and clean higher surfaces before moving downward.
Room by Room
Focus on one room at a time to stay organized.
Use a Checklist
Make a cleaning checklist to ensure you don’t miss anything.
Wipe Surfaces
Clean and disinfect countertops, tables, and other surfaces.
Vacuum & Sweep
Remove dust and debris from floors, carpets, and rugs.
Mop Floors
For hard floors, mop with an appropriate cleaner.
Clean Appliances
Don’t forget to clean appliances, including the refrigerator, oven, and microwave.
Disinfect High-Touch Areas
Pay special attention to doorknobs, light switches, and remote controls.
Windows & Mirrors
Use glass cleaner for streak-free windows and mirrors.
Change Linens
Regularly change and wash bed linens, towels, and kitchen towels.
Trash Removal
Empty trash cans and replace liners.
Organize Cabinets
Periodically declutter and organize cabinets and drawers.
Rotate Tasks
Tackle deep-cleaning tasks like baseboards, vents, and ceiling fans on a rotating basis.
Clean Grout & Tiles
Scrub grout and tiles in bathrooms and kitchens.
Outdoor Cleaning
Don’t forget about outdoor areas like the patio, porch, or garage.
Laundry Routine
Stay on top of laundry to prevent clothing and linens from piling up.
Storage Solutions
Consider storage options to keep items organized and out of sight.
Delegate Tasks
Get family members involved in the cleaning process.
Regular Maintenance
Fix small issues as they arise to prevent bigger problems.
Use Eco-Friendly Cleaners
Consider environmentally friendly cleaning products.
Ventilation
Keep the house well-ventilated while cleaning, especially when using strong chemicals.
Reward Yourself
After cleaning, treat yourself to something you enjoy.
Remember, the key to successful cleaning is consistency and organization. Customize this list to your specific needs and preferences, and your home will be sparkling in no time!

the best ways to clean your ugg boots
Here are the best ways to clean your Ugg boots:
Brush Off Loose Dirt
Start by using a soft-bristle brush to remove any loose dirt or debris from the surface of your boots. This will prevent dirt from getting ground into the suede or sheepskin.
Use a Stain & Water Repellent
Before wearing your Ugg boots for the first time, apply a suede or sheepskin stain and water repellent to protect them from stains and moisture. Reapply this product periodically.
Spot Clean Stains
For minor stains, mix a solution of equal parts water and white vinegar. Dab a clean cloth or sponge into the mixture and gently blot the stained area. Do not rub, as it can damage the suede.
Clean the Entire Boot
To clean the entire boot, mix a solution of warm water and a mild detergent. Use a soft cloth or sponge to gently clean the suede or sheepskin. Rinse with clean water and blot excess moisture with a dry cloth.
Let Them Dry Naturally
Avoid using direct heat sources like radiators or hairdryers to dry your Ugg boots, as it can cause them to lose their shape and damage the sheepskin. Instead, stuff the boots with paper or shoe trees and let them air dry.
Restore the Fluff
If you have sheepskin-lined Ugg boots, use a suede brush to fluff up the sheepskin once they’re dry. Brush in one direction to restore the soft, fluffy texture.
Protect the Soles
If your Ugg boots have rubber soles, clean them separately with a damp cloth. Avoid getting the soles wet when cleaning the upper part of the boots.
Store Properly
When you’re not wearing your Ugg boots, store them in a cool, dry place away from direct sunlight. To maintain their shape, use boot trees or stuff them with paper.
Remember that prevention is key. Regularly applying a stain and water repellent and being mindful of where you wear your Ugg boots can go a long way in keeping them clean and looking great.

how to clean your washing machine
Here’s a list of steps to clean your washing machine:
Gather Supplies
White vinegar or bleach
Baking soda
A microfiber cloth or sponge
A toothbrush or small brush
A clean, dry cloth
Empty the Drum
Remove any clothes or items from the washing machine.
Clean the Detergent Dispenser
Remove the detergent drawer (if applicable) and clean it with warm, soapy water.
Run a Cleaning Cycle
If your washing machine has a self-clean cycle, use it. If not, run an empty hot water cycle with vinegar or bleach to disinfect the machine.
For vinegar, use about 2 cups. For bleach, use 1/2 cup.
Clean the Door Seal
Check the rubber door seal for mold or mildew and wipe it down with a mixture of equal parts water and vinegar.
Scrub the Drum
Use a sponge or microfiber cloth to clean the inside of the drum with a solution of water and baking soda. A toothbrush can help with stubborn spots.
Clean the Lint Filter
Remove and clean the lint filter if your washing machine has one.
Wipe Down the Exterior
Wipe down the exterior of the machine, including the control panel and knobs, with a damp cloth.
Clean the Drain Pump Filter (if applicable)
Some washing machines have a removable drain pump filter. Check your user manual and clean it if needed.
Dry the Drum and Leave the Door Open
After cleaning, leave the door of the washing machine open to allow air circulation, preventing mold and mildew growth.
Regular Maintenance
To prevent future issues, do a maintenance clean every 1-3 months, depending on usage.
Remember to consult your washing machine’s user manual for specific instructions and safety guidelines, as cleaning methods can vary by model.

fun halloween facts
Here are some fun Halloween facts:
Halloween’s origins can be traced back to the ancient Celtic festival of Samhain, which marked the end of the harvest season and the beginning of winter.
Jack-o’-lanterns were originally carved from turnips, not pumpkins. The practice originated in Ireland.
Black and orange are traditional Halloween colors. Black is associated with darkness and death, while orange represents the harvest and autumn.
Halloween is the second-highest grossing commercial holiday after Christmas.
The word “Halloween” comes from “All Hallows’ Eve,” the night before All Saints’ Day, which is observed on November 1st.
In Mexico, the Day of the Dead (Dia de los Muertos) is a festive holiday to honor and remember deceased loved ones.
The world record for the largest pumpkin ever grown was over 2,600 pounds!
The fear of Halloween is known as Samhainophobia.
Some people believe that wearing your clothes inside out on Halloween will help you see a witch at midnight.
Harry Houdini, the famous magician, died on Halloween in 1926.
I hope you find these facts entertaining and Happy Halloween!

how to preserve your wedding gown
Here’s a list of steps to help you preserve your wedding gown:
Clean It
After the wedding, have your gown professionally cleaned by a reputable wedding dress cleaner. This will remove any stains and prevent them from setting.
Choose the Right Cleaner
Make sure the cleaner specializes in wedding dresses and has experience with delicate fabrics. Ask for recommendations or read reviews.
Store It in a Breathable Bag
Avoid plastic bags, as they can trap moisture. Use a breathable, acid-free garment bag to protect your gown from dust and light.
Avoid Attics & Basements
Store your gown in a cool, dry place with a stable temperature. Attics and basements are prone to temperature fluctuations and humidity.
Protect from Light
Keep your dress away from direct sunlight or artificial light, as it can cause fabric discoloration.
Use Acid-Free Tissue Paper
Stuff the bodice, sleeves, and any other structured parts of the dress with acid-free tissue paper to help it maintain its shape.
Check Regularly
Periodically inspect your gown for any signs of yellowing, stains, or damage. Catching issues early can prevent them from becoming irreversible.
Avoid Hanging for Long Periods
Long-term hanging can cause stress on the fabric and distort the gown’s shape. If hanging, use padded hangers.
Keep It Away from Moths & Pests
Consider adding mothballs or cedar blocks to deter insects and pests.
Handle with Clean Hands
If you need to touch your gown, make sure your hands are clean to avoid transferring oils and dirt.
Seal It in an Acid-Free Box
If you plan on storing it for a long time, consider sealing your gown in an acid-free box with a clear window for viewing.
Document & Insure
Take photos of your gown and keep any paperwork related to its cleaning and preservation. Consider insuring it against damage or loss.
Avoid Using Plastic Containers
Plastic can emit fumes that might harm your dress. Stick with acid-free, archival-quality materials.
Revisit Periodically
Every few years, take your gown out of storage to inspect it and refold it in a different way to prevent creases from setting.
Handle with Care
If you decide to wear it again or pass it down, be cautious with makeup, food, and jewelry to avoid new stains.
By following these steps, you can help ensure your wedding gown remains in excellent condition for years to come.
tips to help you keep your white clothes white without using toxic bleach
Here’s a list of tips to help you keep your white clothes white without using toxic bleach:
Separate Whites
Always wash white clothing separately from colored items to prevent color bleeding.
Use White Detergent
Opt for detergents specially formulated for white clothes, as they contain brightening agents.
Pre-Treat Stains
Address stains promptly with a pre-treatment stain remover or a paste of baking soda and water.
Sunlight Bleaching
Hang white clothes in the sun, as sunlight can naturally bleach and brighten them.
Avoid Overloading
Don’t overcrowd the washing machine; leave enough room for clothes to agitate and get clean.
Cold Water Wash
Wash whites in cold water to prevent setting stains and save energy.
Opt for Oxygen Bleach
Use oxygen bleach (e.g., hydrogen peroxide or sodium percarbonate) as a bleach alternative that’s gentler on the environment.
Lemon Juice Soak
Soak white clothes in a mixture of lemon juice and water for a natural bleaching effect.
Vinegar Rinse
Add a cup of white vinegar to the rinse cycle to help brighten and soften white fabrics.
Avoid Fabric Softeners
Skip fabric softeners, as they can leave residues that dull white clothing.
Maintain Washer Cleanliness
Regularly clean your washing machine to prevent detergent and dirt buildup on clothes.
Proper Storage
Store white clothes in a cool, dark place to avoid yellowing due to exposure to light and heat.
Gentle Drying
Opt for air drying or use the lowest heat setting on your dryer to prevent heat damage.
Test New Products
Before using a new product or method, test it on a small, inconspicuous area of your white clothing.
Repurpose Old Whites
If some whites are beyond saving, repurpose them as cleaning rags to reduce waste.
These tips should help you maintain the whiteness of your clothes without resorting to toxic bleach.
common stain removal products and how to use them
Here’s a list of common stain removal products and how to use them:
Baking Soda
For grease and oil stains, sprinkle baking soda on the stain, let it sit for 15-30 minutes, and then brush or vacuum it off.
You can also create a paste by mixing baking soda with water and apply it to stains, then rinse.
White Vinegar
Mix equal parts of white vinegar and water to remove stains on carpets or fabrics.
Dab the solution on the stain, blot with a clean cloth, and repeat until the stain is gone.
Hydrogen Peroxide
Effective for removing blood stains. Apply hydrogen peroxide directly to the stain, let it bubble, then blot with a clean cloth.
Club Soda
Great for red wine or coffee stains. Pour club soda on the stain and blot with a cloth.
Lemon Juice
Works well on fruit and rust stains. Apply lemon juice to the stain and let it sit in the sun to bleach the stain.
Salt
For fresh red wine spills, cover the stain with salt to absorb the liquid, then rinse with cold water.
Cornstarch
Effective for greasy stains. Sprinkle cornstarch on the stain, let it sit, and then brush or vacuum it off.
Dish Soap
For many common stains, dilute dish soap with water and apply to the stain. Blot and rinse with water.
Rubbing Alcohol
Useful for ink and marker stains. Dab the stain with rubbing alcohol, then blot with a clean cloth.
Commercial Stain Removers
There are various commercial stain removers available for specific stains. Follow the product’s instructions for usage.
Remember to test any stain removal method on a small, inconspicuous area of the fabric or surface first to ensure it doesn’t cause damage. Different stains may require different approaches, so it’s essential to identify the stain type before attempting removal.
guideline for how often you should wash different types of clothes
Here’s a general guideline for how often you should wash different types of clothes:
Underwear
After each wear
Socks
After each wear
T-shirts & Tank Tops
After each wear
Jeans
Every 3-4 wears
Dress Shirts
After 1-2 wears
Sweaters
After 3-4 wears
Pajamas
Every 3-4 wears
Outerwear (coats, jackets)
Every few weeks or as needed
Gym Clothes
After each workout
Swimwear
After each use
Bedding (sheets, pillowcases)
Every 1-2 weeks
Towels
Every 3-4 uses
Bras
After 3-4 wears
Formal Attire (suits, dresses)
After each wear or as needed
Baby Clothes
After each wear due to frequent spills and accidents
Work Uniforms
After each wear or as required by your job
Keep in mind that these are general recommendations, and the frequency of washing can vary based on personal preferences, climate, and the level of physical activity. Always check care labels on your clothing for specific instructions.

ways to make your laundry more eco-friendly
Here’s a list of ways to make your laundry more eco-friendly:
Use Cold Water
Washing your clothes in cold water can significantly reduce energy consumption.
Full Loads Only
Wait until you have a full load of laundry before running the washing machine.
Energy-Efficient Appliances
Invest in energy-efficient washing machines and dryers.
Eco-Friendly Detergents
Choose detergents that are biodegradable and free of harsh chemicals.
Line Drying
Whenever possible, air-dry your clothes on a line or drying rack to save energy.
Reduce Detergent Use
Use the recommended amount of detergent to avoid overuse.
Wash Less Often
Re-wear lightly worn items before washing them.
Eco-Friendly Stain Removal
Use eco-friendly stain removers or natural alternatives like baking soda and vinegar.
Microfiber Filters
Install microfiber filters to catch microplastics released from synthetic fabrics.
Eco-Friendly Fabric Softeners
Use alternatives like white vinegar or wool dryer balls instead of conventional fabric softeners.
Choose Sustainable Fabrics
Opt for clothing made from sustainable materials like organic cotton, hemp, or Tencel.
Repair & Mend
Extend the life of your clothing by repairing tears and mending seams.
Second-Hand Shopping
Consider buying second-hand clothes to reduce the demand for new production.
Recycle Old Clothing
Donate or recycle old clothing instead of sending it to the landfill.
Front Loading Washer
If possible, use a front-loading washing machine as it’s generally more water and energy-efficient.
Run Shorter Cycles
Select shorter wash and rinse cycles to save water and energy.
Eco-Friendly Dryer Settings
Use the lowest heat setting when drying clothes to save energy.
Unplug Appliances
When not in use, unplug your washer and dryer to prevent standby power consumption.
Green Laundry Room
Use eco-friendly practices in your laundry room, like using energy-efficient lighting.
Conserve Water
Fix any leaks in your plumbing to reduce water waste.
Reusable Laundry Bags
Use reusable laundry bags instead of disposable ones.
Educate Yourself
Stay informed about eco-friendly laundry practices and products.
By following these tips, you can make your laundry routine more environmentally friendly and reduce its impact on the planet.

how to starch your laundry like a pro
Here’s a list of steps on how to starch your laundry like a pro:
Gather Supplies
Starch spray or liquid starch
Iron and ironing board
Clean, dry clothes
Read Clothing Labels
Check the care labels on your clothing to ensure they can be starched.
Prepare Starching Solution
Follow the instructions on the starch product to prepare the starch solution.
Test a Small Area
Before applying starch to your entire garment, test a small, inconspicuous area to ensure it doesn’t cause any damage or staining.
Iron Setting
Adjust your iron to the appropriate setting for the type of fabric you are starching.
Spray Starch
Hold the garment taut and evenly spray a light coat of starch onto the fabric. Be sure not to oversaturate.
Let Starch Absorb
Allow the starch to be absorbed into the fabric for a minute or two.
Iron the Garment
Iron the starched area, using steady, even pressure. Start from the collar or top of the garment and work your way down.
Steam if Necessary
For extra crispness, use the steam function on your iron.
Repeat if Needed
If you desire more stiffness, repeat the starching process on the same area.
Hang or Lay Flat
After starching, hang the garment or lay it flat to dry and set the starch.
Inspect & Store
Once your clothing is dry, inspect it for any wrinkles or areas that need touch-ups. Store it properly to maintain the starched effect.
Remember to always follow the specific instructions provided on the starch product you’re using and be cautious when applying starch to delicate fabrics. Starching can help your clothes look crisp and fresh, but it’s important to use the right technique for your garments.

tidy habits that can positively impact your life
Here’s a list of tidy habits that can positively impact your life:
Make Your Bed
Start your day with a small accomplishment by making your bed every morning.
Declutter Regularly
Set aside time to declutter your living spaces. A clutter-free environment promotes mental clarity.
Create a To-Do List
Organize your tasks for the day or week with a to-do list to stay on top of your responsibilities.
Put Things Back
Always return items to their designated places after use.
Digital Organization
Organize your digital files and emails to save time and reduce stress.
Minimalism
Embrace a minimalist lifestyle by owning fewer possessions and focusing on what truly matters.
Clean as You Go
After cooking or working on a project, clean up your workspace or kitchen immediately.
Time Management
Practice good time management to reduce stress and increase productivity.
Donate & Recycle
Regularly go through your belongings and donate or recycle items you no longer need.
Set Routines
Establish daily and weekly routines to create structure in your life.
Mindfulness
Practice mindfulness to stay present and aware of your surroundings.
Maintain a Calendar
Use a calendar or digital planner to keep track of appointments and deadlines.
Label & Categorize
Label storage containers and categorize items to find them easily.
Laundry Routines
Set a consistent laundry schedule to avoid a pile-up of dirty clothes.
Practice the “One-In, One-Out” Rule
When you bring a new item into your home, consider donating or getting rid of one item to maintain balance.
Deep Cleaning
Plan periodic deep cleaning sessions for a thorough clean of your living space.
Regular Exercise
Incorporate regular physical activity into your routine to stay healthy and energized.
Digital Detox
Take breaks from screens and social media to recharge and reduce digital clutter.
Meal Planning
Plan meals in advance to reduce food waste and make healthier choices.
Set Goals
Define your life goals and work towards them systematically.
Incorporating these tidy habits into your daily life can lead to increased productivity, reduced stress, and an overall improved sense of well-being.
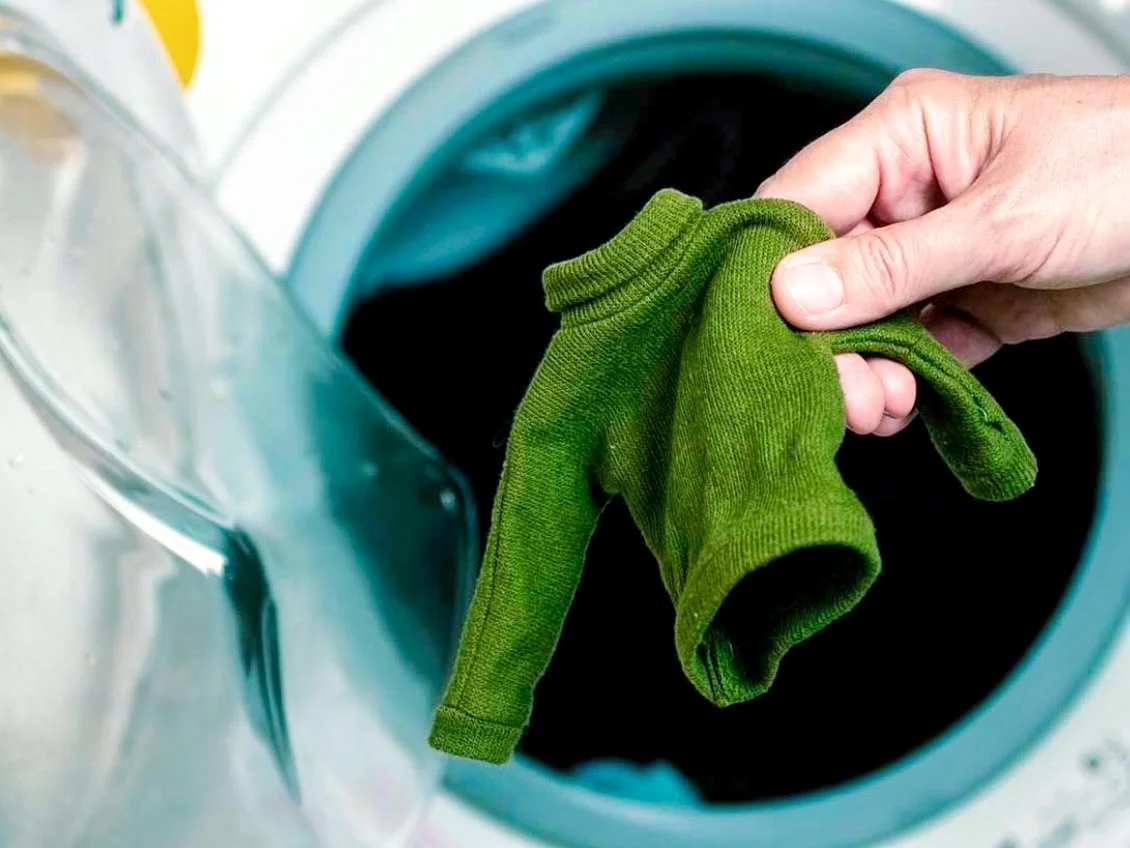
how to unshrink clothes
Here’s a list of steps to help you unshrink clothes:
Fill a basin or sink with lukewarm water.
Add a capful of baby shampoo or hair conditioner to the water.
Gently submerge the shrunken garment in the water, making sure it’s fully soaked.
Allow the clothing to soak for about 30 minutes, occasionally gently agitating it.
After soaking, carefully remove the garment from the water and gently squeeze out excess water. Do not wring it.
Lay the garment flat on a towel and roll it up to absorb more water.
Place the garment on a clean, dry towel on a flat surface.
Gently stretch the clothing back to its original shape. This may take some time and patience.
Use your hands to gently massage and stretch the fabric, paying attention to the areas that shrank.
Allow the garment to air dry completely. Avoid using heat or direct sunlight, as this can further shrink the fabric.
Check the progress as it dries, and continue to stretch and shape as needed.
Remember, this method may not work for all fabrics, and results can vary depending on the material and the extent of the shrinkage. It’s essential to be gentle during the process to avoid damaging the clothing further.

ways to get a better night’s sleep by fixing your bedding
Here are some ways to get a better night’s sleep by fixing your bedding:
Invest in a comfortable mattress
A quality mattress that suits your sleeping preferences can make a significant difference in sleep quality.
Choose the right pillow
Select a pillow that supports your head and neck to prevent discomfort during the night.
Use high-quality sheets
Soft, breathable, and moisture-wicking sheets can improve your sleep comfort.
Opt for the right duvet or comforter
Choose the appropriate weight and warmth for your climate and personal preferences.
Keep your bedding clean
Regularly wash your sheets, pillowcases, and duvet covers to maintain a fresh and hygienic sleep environment.
Control room temperature
Adjust the bedding and room temperature to ensure you’re neither too hot nor too cold during the night.
Blackout curtains
Use these to block out light from outside, creating a dark and peaceful sleeping environment.
Noise control
Consider white noise machines or earplugs to minimize disruptive sounds.
Limit screen time before bed
The blue light from screens can interfere with your sleep, so avoid using electronic devices before bedtime.
Choose calming colors
Decorate your bedroom with soothing and relaxing colors that promote a peaceful atmosphere.
Keep your bed for sleep & intimacy only
Avoid working or watching TV in bed to associate it with restful activities.
Develop a bedtime routine
Create a consistent pre-sleep routine to signal to your body that it’s time to wind down.
Invest in a quality mattress topper
If your mattress is too firm or too soft, a topper can provide the right level of comfort.
Use a body pillow
This can help with alignment and reduce discomfort, especially for side sleepers.
Try weighted blankets
They can provide a sense of security and comfort, which may lead to better sleep.
Maintain good sleep hygiene
Keep a regular sleep schedule, avoid caffeine and heavy meals close to bedtime, and get regular exercise.
Consider adjustable bed bases
These allow you to customize your sleeping position for maximum comfort.
Air out your bedding
Occasionally, allow your bedding to air out in the sunlight to reduce moisture and odors.
Upgrade your mattress & bedding as needed
Over time, your sleep needs may change, so be prepared to replace or upgrade your bedding as necessary.
Remember that individual preferences vary, so what works for one person may not work for another. Experiment with these suggestions to find the best combination for your specific sleep needs.

money-saving laundry ideas
Here are some money-saving laundry ideas to help you reduce your laundry-related expenses:
Use cold water
Washing clothes in cold water can save on energy costs because heating water accounts for a significant portion of laundry expenses.
Full loads only
Wait until you have a full load of laundry before running the washing machine to maximize its efficiency.
Energy-efficient appliances
If possible, invest in energy-efficient washing machines and dryers, as they can save you money over time.
Air dry clothes in dryer
Whenever feasible, hang your clothes outside to dry instead of using a dryer. This can save on electricity or gas costs.
Dry similar fabrics together
Grouping similar fabrics together can reduce drying time, as they tend to dry at similar rates.
Use dryer balls
Adding dryer balls or clean tennis balls to your dryer can help reduce drying time by fluffing and separating clothes.
Clean lint filters
Regularly clean the lint filter in your dryer to ensure it operates efficiently and reduces the risk of fires.
Choose shorter wash cycles
Opt for shorter wash cycles when your clothes aren’t heavily soiled to save on water and energy.
Pre-treat stains promptly
Treat stains immediately to avoid the need for multiple wash cycles.
Measure detergent
Use the recommended amount of detergent to avoid overuse, which can lead to extra rinses.
Make your own detergent
Consider making homemade laundry detergent as a cost-effective alternative to store-bought brands.
Reuse dryer sheets
Dryer sheets can often be reused for multiple cycles, saving you money.
Wash in bulk
If you have access to a laundromat, consider doing all your laundry in one visit to save on transportation costs.
Repair, don’t replace
Mend clothes with small tears or missing buttons instead of buying new items.
Buy high-quality clothing
Invest in durable, high-quality clothing that lasts longer, reducing the frequency of replacement.
Use vinegar as a fabric softener
Instead of commercial fabric softeners, add a bit of white vinegar to the rinse cycle to soften clothes naturally.
Dryer vent maintenance
Ensure that your dryer’s vent system is clean and unobstructed to improve its efficiency.
Wash less frequently
Not all clothes need to be washed after every wear. Extend the time between washes for items that aren’t visibly dirty.
By implementing these money-saving laundry ideas, you can cut down on your laundry costs while still maintaining clean and fresh clothes.

reasons why you should and should not wash your sheets and towels together
Here are reasons why you should and should not wash your sheets and towels together:
Reasons to Wash Sheets and Towels Together
Efficiency
Washing sheets and towels together can be efficient since they are often made of similar materials and can be laundered using similar wash settings.
Full Loads
Combining sheets and towels can help you create fuller laundry loads, which can be more energy and water-efficient.
Time-saving
Washing them together can save time, as you won’t need to run separate loads for sheets and towels.
Convenience
It’s convenient to put sheets and towels in the same load if you’re short on time or have limited laundry space.
Color matching
Sheets and towels often share similar color schemes, making them suitable to wash together without worrying about color bleeding.
Reasons Not to Wash Sheets and Towels Together
Lint Transfer
Towels can shed lint, and washing them with sheets may result in lint transfer, leaving lint on your bedding.
Roughness
Towels can be rougher in texture than sheets, and washing them together may cause abrasion, potentially damaging the softer fabric of the sheets.
Different Wash Requirements
Sheets and towels may have different care instructions and wash temperature requirements. For example, some sheets may need a gentler wash than towels.
Faster Wear & Tear
Washing sheets and towels together frequently can lead to faster wear and tear on both items due to the friction between them.
Hygiene Concerns
Towels can harbor more bacteria and germs than sheets due to their frequent use. Washing them separately may help maintain better hygiene.
Drying Time
Towels generally take longer to dry than sheets. Combining them in one load may result in uneven drying, with one type of fabric being under-dried or over-dried.
In summary, washing sheets and towels together can save time and energy, but it may result in lint transfer, fabric abrasion, and potential differences in care requirements. It’s essential to consider the specific fabrics, colors, and care instructions of your sheets and towels when deciding whether to wash them together or separately.